Vivid Trace の30日間無料試用を始める
Vivid Trace を Jira にインストールする
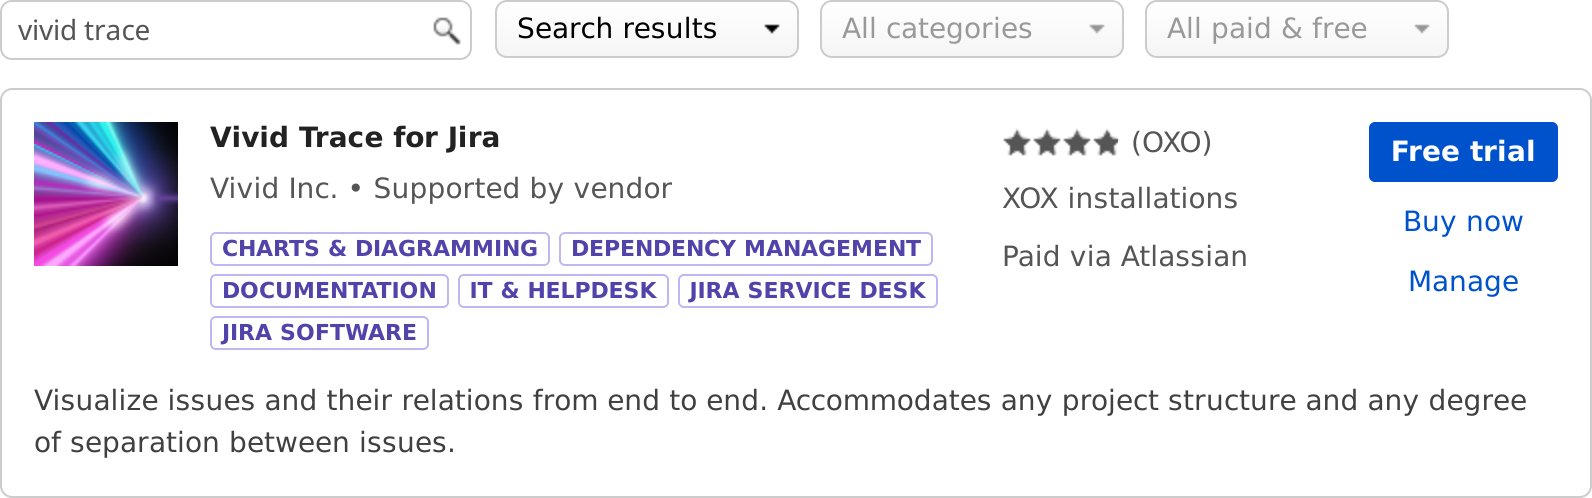
Atlassian Marketplace で「Vivid Trace」を検索してください。
無料試用を選び、指示を従って Vivid Trace をインストールすることができます。
「Generate License」をクリックすると無料試用版ライセンスが発行されて・・・
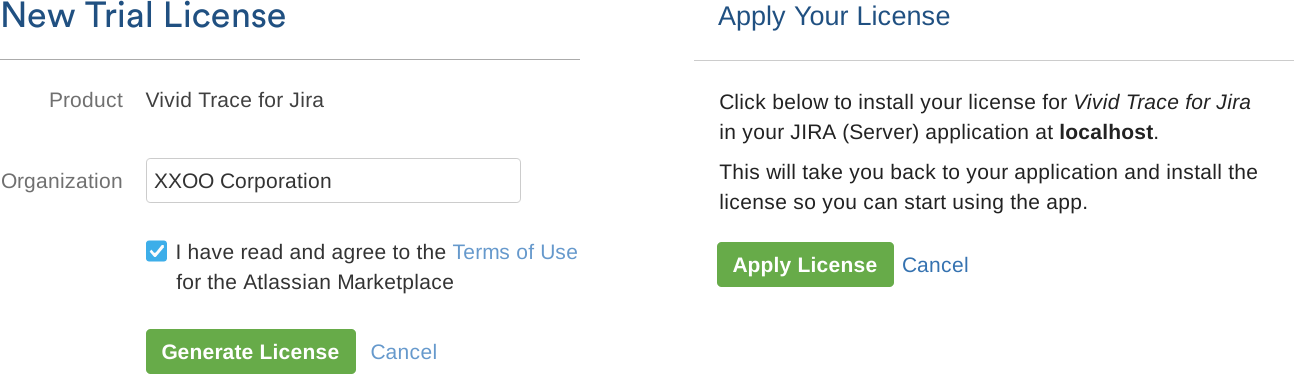
「Apply License」を押すと Jira に適用されます。30日間無料試用はこれで開始!
Jira の検索インデックスの再構築を行う
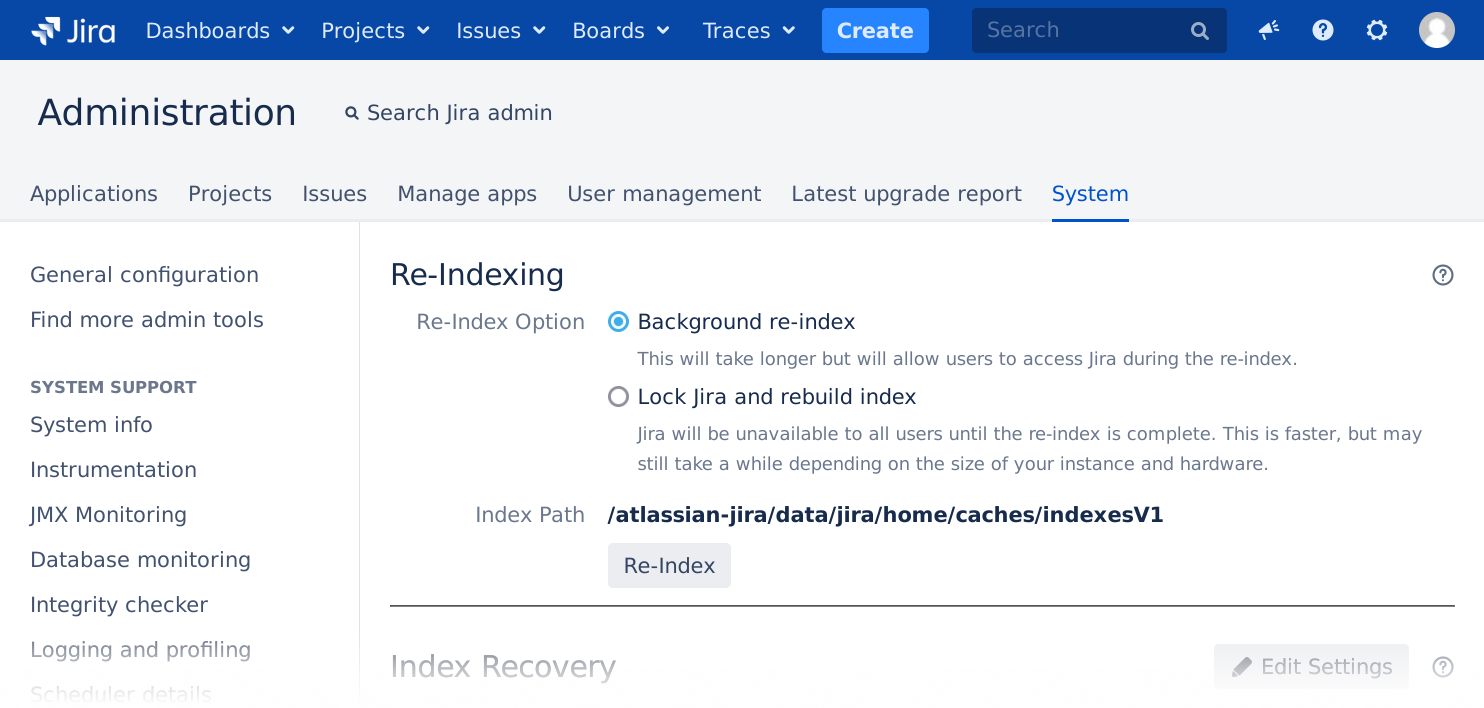
再インデックス化の実行が終わると Vivid Trace をご利用できます。バックグラウンドインデックスを選択していただくと再構築作業が実行されている間にもユーザは普通に Jira を利用できます。
Vivid Trace による課題関係図を見る
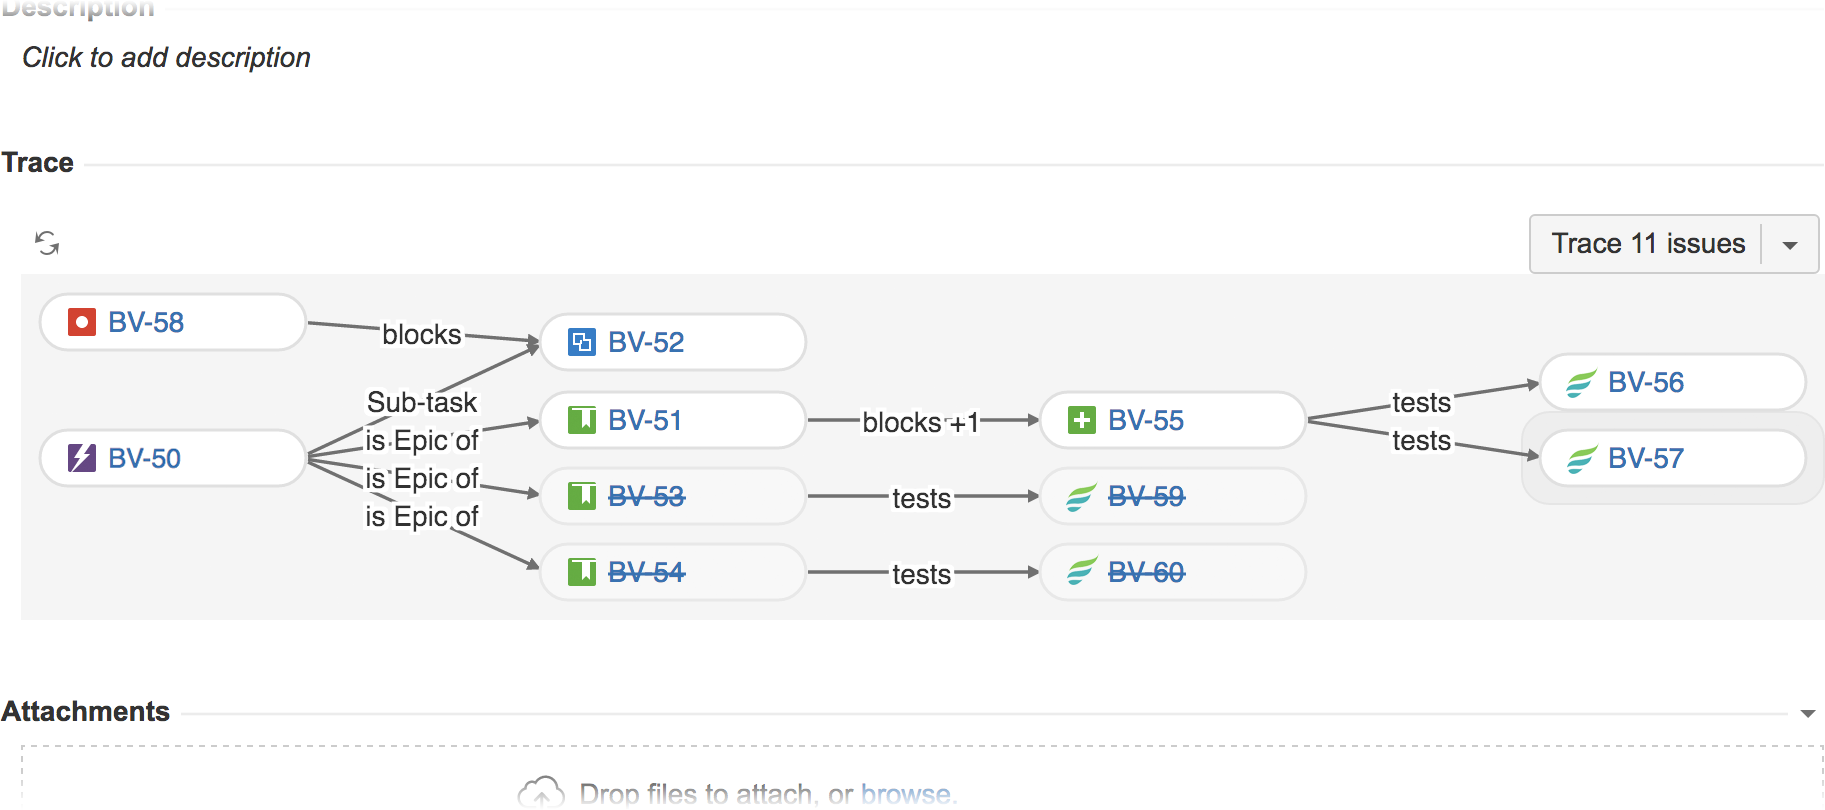
他の課題とリンクされている課題の詳細画面を確認してみましょう!
次にできること
Quickly learn about what else you can do with Vivid Trace by scanning over the 機能と特徴ツアー, doing the Trace Studio Quickstart, and browsing the list of topics in the ソリューション・ガイド.
Tell your teammates. They will also see traces on their Jira issue pages and might be wondering about the new features. Share the はじめに document with them.
Familiarize yourself with Vivid Trace's capabilities and the product information resources by looking over the ドキュメンテーション一覧.
Give your teams a solid start with the prepared Deployment Readiness Checklist.
Make Jira speak your language with additional language packs.
Take advantage of Vivid's コンシェルジェ・サービス to help you quickly become productive with Vivid Trace.
Have questions or something to say? Vivid認定パートナーに問い合わせるもしくはVividサポートに問い合わせる。
Full installation instructions are detailed in アドオン管理.